
Are you just starting to learn to sew?
Have you just taken up sewing and are looking for some tips to get started, and, most importantly, how to avoid those common sewing mistakes?
We’re sewing mad at Contrado. After all, we make everything by hand (and sewing machine), right here at our studio, and, over the years, we have worked with many sewers, some brand new and some seasoned professionals.
How to sew and avoid common sewing mistakes
When you are starting your sewing journey and just understanding how to sew, it is so easy to make sewing mistakes. Sometimes, it is the best way to learn. However, we want to help eradicate these mistakes, or at least, help rectify them, if they are made.
Just remember to practise, practise, practise and don’t give up if you do make a few errors. Practise makes perfect!
1. Measure twice, cut once
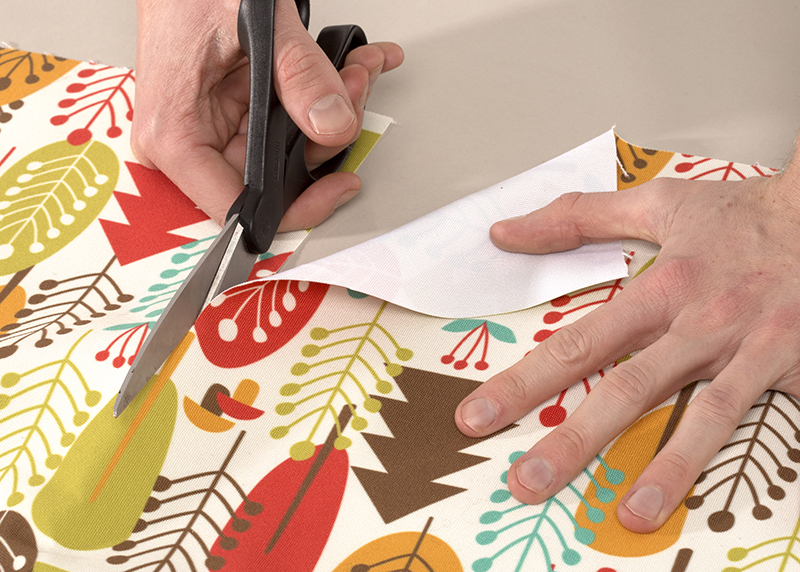
What is the mistake? Inaccurate cutting of your pattern.
Make sure you align accurately with fabric grain lines. Lay your cloth on a flat surface, like a clean floor. If you place your fabric on a table, make sure parts of it aren’t hanging over the edge, as this may pull it out of shape. If you need to cut on fold, ensure the fold is exactly on grain. Always check twice that the pattern pieces are perfectly aligned with grainlines, then pin all around them, before cutting. Inaccurate cutting is one of the worst beginner sewing mistakes. By following these steps, you can easily avoid it.
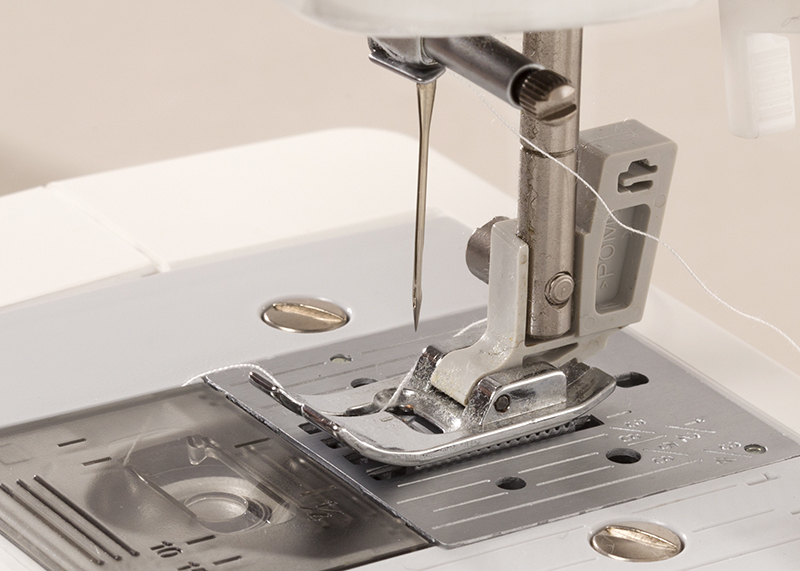
2. Use your presser foot
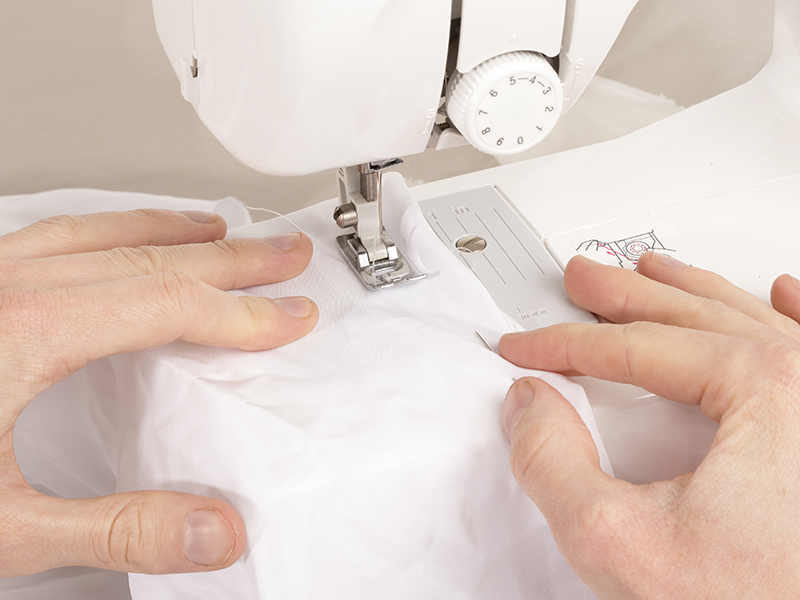
What is the mistake? Not using your presser foot properly.
The presser foot holds the fabric in place, so you can always stitch neatly, so make sure you use it. Forgetting to put the presser foot in the “down” position before you begin to sew will cause the material to jump around and it won’t “walk” backwards easily; you might get bunched up with your threads in a tangled mess!
3. Get the right tension
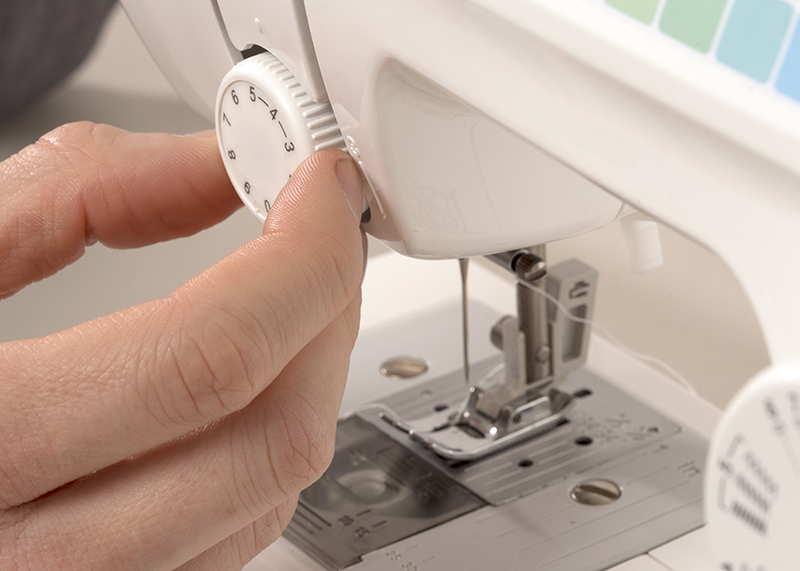
What is the mistake? Not checking your tension dial or your bobbin.
Tensioning is a common complaint for sewers, and it is a tough skill to master, which even experienced sewers can struggle with. The tension dial does exactly what it says on the tin – it adjusts the tension on the spool of thread. Sometimes, when the stitching looks uneven or it is very tight on the top side, this can be a result of the thread tension. Before you begin fiddling with the tension settings, check that your bobbin is threaded properly. The bobbin should be threaded into the bobbin case correctly, with thread unspooling in the correct direction (usually anticlockwise). You can sew test fabrics first to check your tensioning is correct. We recommend taking note of your settings before you start trying to adjust tension dials.
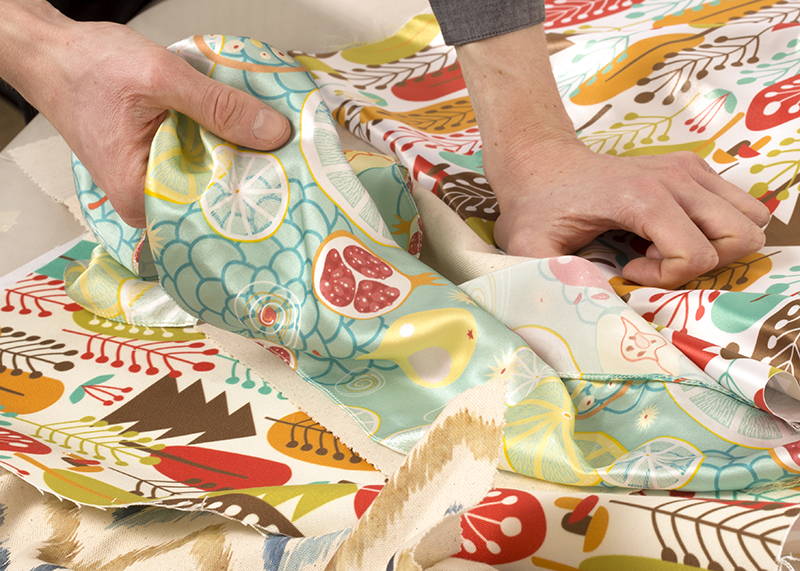
4. Don’t forget about your seams
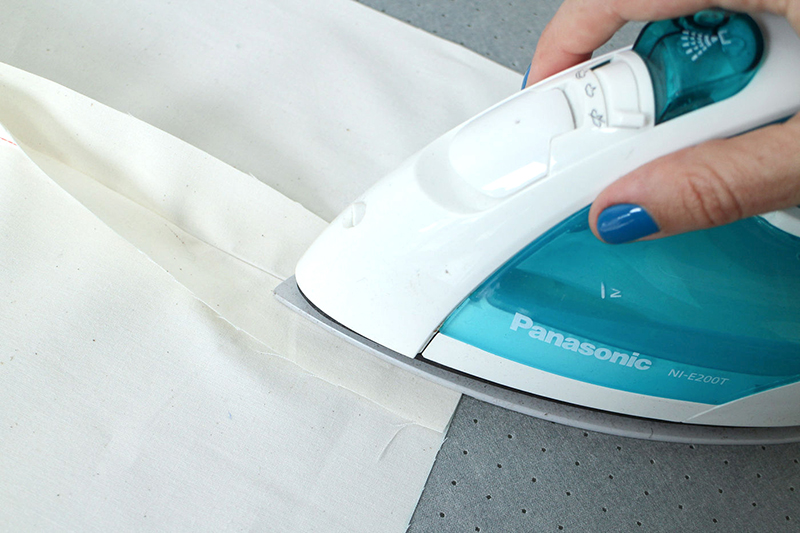
What is the mistake? Sewing your seams the wrong side up and not pressing them.
If you are sewing clothing, then knowing about seams is vital! When sewing seams, you’re constantly working on the inside of your garment, and reversing. This can be a tricky move to get used to, but it is so important to make sure you sew seams on the correct side.
When using patterned textiles, remember to place patterned sides facing each other, because when you reverse, they will end up on the outside. Also, try and get used to pressing your seams as you go, before joining seams, and ironing your fabric before you get started. This will make your finished project look a lot more professional and reduces the risk of puckering. Bumpy fabric can also result in inaccurate cutting and sewing, which could all lead to a sewing disaster!
5. Gaping buttons
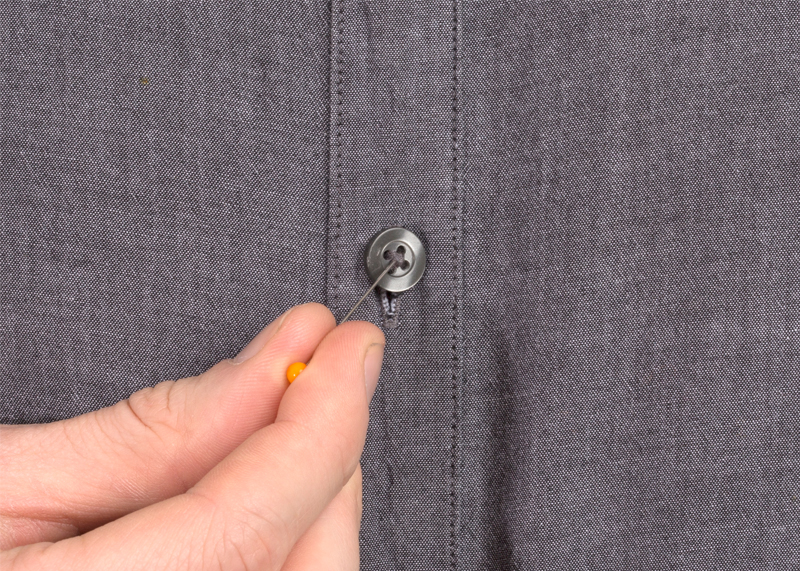
What is the mistake? Not measuring yourself to get accurate buttonhole placements.
Buttons and buttonholes can be a tricky skill to master.
Jane Marland from Handmade Jane (www.handmadejane.co.uk) gave us the following tip; “When sewing buttonholes on a shirt or blouse, don’t rely on the buttonhole placement guides that come with the pattern. I used to follow these guides religiously and then wonder why my shirts always gaped at the bust. Buttonhole guides are very generalised and you will always get a better result by measuring yourself carefully and adjusting where the buttonholes go. The easiest way to do this is to try the shirt on, place a pin at the fullest part of the bust and mark the position. This is your ‘critical’ buttonhole and if this one is positioned correctly, you shouldn’t have any gaping. To determine where the remaining buttons should go, just divide the space on the buttonband equally between the number of buttons you’re using.”
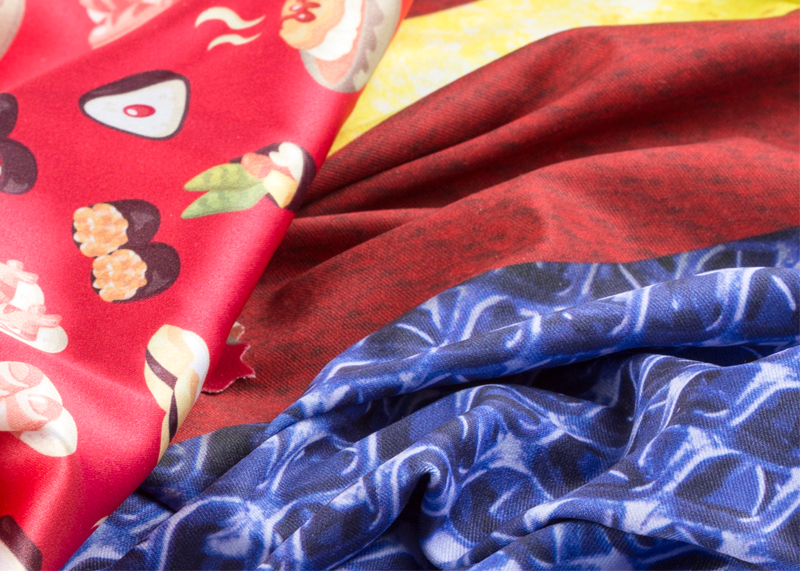
6. Get the right fabric for the job
What is the mistake? Choosing the wrong fabric for your project.
Don’t get side tracked by the pretty, colourful fabrics, if they are not the right textiles for the job at hand! It can be very easy to be persuaded to use a certain textile, thanks to its colour, pattern, or style, but most patterns have suggested fabrics, which have been carefully chosen to best suit the structure of the finished garment. By choosing a fabric based on its aesthetics alone, you might not be able to complete your project.
7. Check your needle and thread
What is the mistake? Choosing the wrong type of needle and thread.
When making most kinds of garments, you should use a 100% polyester, all-purpose thread. Make sure you check the label, as certain threads, such as rayon, silk and quilting thread are not appropriate for garment construction. Universal needles are mostly used for sewing natural fibres, and ballpoint or jersey needles are best for sewing with knits.
There are needles designed for stretchy fabrics, such as stretch needles, as well as speciality needles for materials such as metallic and leather. Ensure you match the needle to the weight of the cloth and check the intended purpose before starting your project. While we are on the subject of needles; make sure the needle in your sewing machine is changed regularly. It is recommended that sewing machine needles should only be used for 6 – 8 hours of sewing time, before being replaced by a fresh one. This will ensure a smooth and more accurate finish.
8. Learn how to read a sewing pattern
What is the mistake? Not being able to understand a sewing pattern and sewing terminology.
When you are following a pattern, it is important to remember that every single mark, symbol, and label on the pattern is there for a reason, and they all mean something. Phrases such as; the grainline, fold lines, finishes measurements etc., all mean something, and we recommend reading up about sewing terms before getting started on your project. Education is key, so if there is anything you don’t understand, look it up or ask someone with more sewing experience.
9. Have plenty of fabric at hand
What is the mistake? Not having enough fabric in case of errors.
When you are just getting started, it can be very easy to make an error or mistake when you are cutting out a pattern, which leads you to having to discard that piece of fabric. When you buy the material for your sewing project, buy a bit extra, to cover these kinds of errors. Some fabrics also tend to shrink in the wash, so by having some extra material, all your bases are covered. This leads us onto the next mistake to avoid…
10. Fabric preparation is key
What is the mistake? Not prepping your fabric correctly.
Prepping your fabric before you embark on your project is a necessity! Some textiles need to be washed or even dry cleaned before they can be used. Denim, for example, needs to be machine washed and wool needs to be dry cleaned. Some fabrics can shrink after washing them, and if you haven’t prepared for it, then your garment will not fit properly when it is made. Sewing disaster!
Amy Thomas, Editor of Love Sewing magazine and Almond Rock (almondrock.co.uk) gave us the following advice: “I’d say it’s easy to forget about fabric shrinkage and then be heartbroken when you first wash a finished garment. I recommend washing fabric as soon as you bring it home so you’re ready to sew straight away!”
11. Keep it simple to start with

What is the mistake? Choosing an overly complicated pattern, when you are a sewing newbie.
Before hitting the big-league patterns and projects, it is imperative to master stitching straight and stitching accurately on woven textiles. Tops, long, floaty skirts, knickers and longline tops are great, simple sewing projects to get started with. While we are at it, we also recommend just sticking to one project at a time. Make and finish each project as you go. Along the way of each one, you will learn, and make mistakes, which you can avoid in your next project.
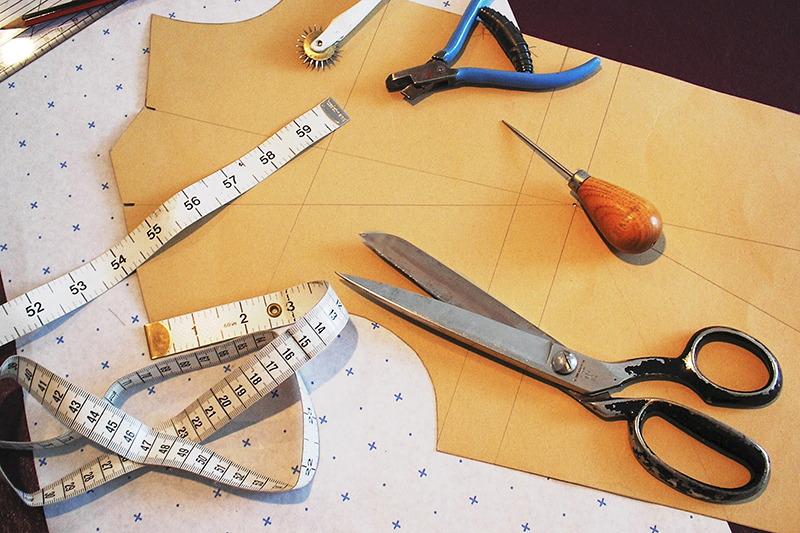
12. Use the right tools
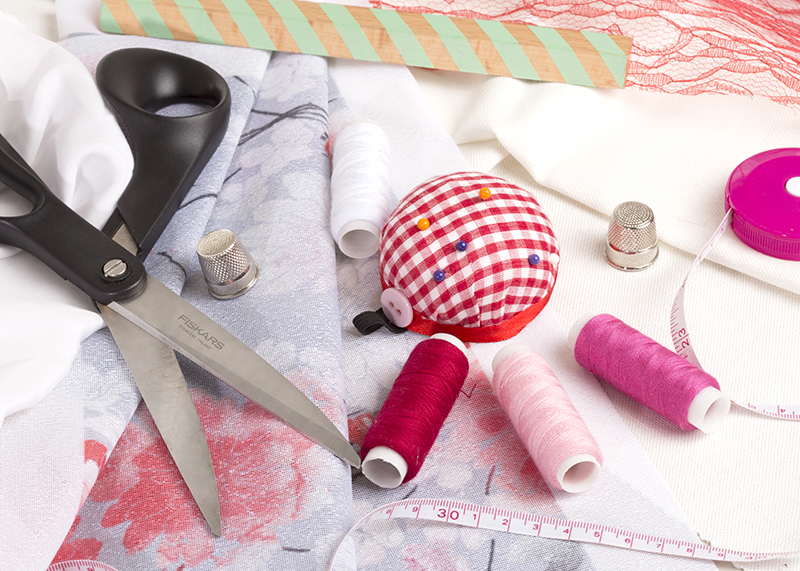
What is the mistake? Using the wrong sewing tools for your project.
A lot of simple sewing mistakes can be avoided by simply using the correct tools. We have looked at the importance of using the correct needles and thread, but it goes beyond that.
Scissors. There is a world of difference between kitchen scissors and sewing appropriate scissors. Not all scissors are created equal! You need good quality SHARP scissors to cut your fabric. Never use your regular household scissors, that you have used to cut paper, packaging etc, to cut your material. This will blunt your blade significantly. Keep sewing scissors sharp and well-maintained so they can chop through fabric smoothly. Also, don’t use scissors to rip out a seam. Use a seam ripper instead – they are made specifically for this purpose. They are quicker and better than scissors, and will prevent your fabric from ripping.
Erin from Seamstresserin.com (seamstresserin.com) also recommends using traditional sewing techniques and tools; “a common mistake is to ignore “old-fashioned” techniques. I spent most of my sewing career using every single technique to mark my fabric other than using tailor’s tacks, thinking that tailor’s tacks were somehow difficult or antiquated because they are such a traditional technique. I finally tried using them only to find that they are simple, accurate, and so useful! Now I can’t imagine sewing without them and I wish I would have been using them for years!“
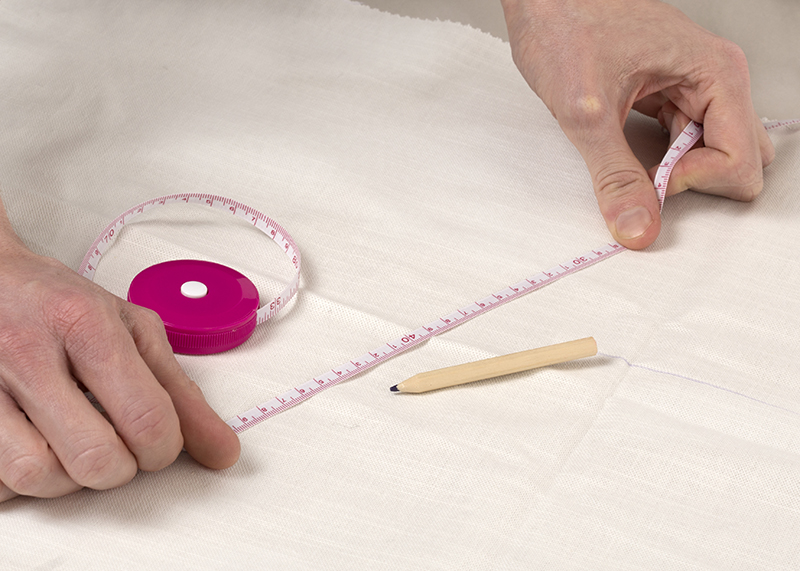
13. Know your measurements

What is the mistake? Not knowing your measurements when making clothes for yourself.
No, we’re not talking about the standard store sizes, we mean YOUR actual body measurements. We have written a blog post about how to take your measurements, which should help, if you need some advice for how to do this. By knowing the exact measurements of the body you are sewing for, you will avoid a lot of heartache and annoyance at the completed project, if it doesn’t measure up.
Now you are clued up on sewing, why not trying all different kinds of fabrics in your own swatch pack?

Hi there, just became alert to your blog through Google, and
found that it is truly informative. I am going to
watch out for brussels. I’ll be grateful if you continue this in future.
Numerous people will be benefited from your writing. Cheers!
Appreciate the recommendation. Let me try it out.
I loved the article, Thank you so much for providing the tips, I will share this with my friends, We don’t know who might me making these same mistakes. I have been sewing for long time now and I am sure that people do make these mistakes. I also did some and learned through time.
Your photos look great !!!
Prеtty! This was an іnredibly wonderful article.Thank you fοr supplying this info.
Using natural fibers is a primary consideration for any of my sewing projects. Frequently I have bought lovely garments made with rayon or 100% rayon. After 40 plus years of knowing and loving textiles, I truly didn’t realize or understand the production of viscose.
Fascinating! More so that the production of this fibre is becoming more friendly to our environment. The lovely combinations of fires in mixed fabrics and especially the velvets that we are seeing in home decor make such beautiful items. I love silks as well. Even silk has it’s unsavory side of production. Thanks for the great and useful info.
Fabulous website and article. I’m 64, and have been sewing for 60+ years. I “lucked” onto your article after searching for the history of the sewing machine! I found the article accurate and informative, and plan to become a permanent subscriber.
after joining my cloth I discovered that the label information appeared boldly at center of my padded… how do I correct this mistake
Thanks, really informative. I would be glad to read more from you.