It’s great putting your own art onto fabrics and products. Especially when you have a piece that is just perfect for the item in question. But what about those smaller pieces you have? Those little doodles, the simplistic yet still just as stunning pieces. Often, the perfect place for these is within a pattern. Find out how to make a repeating pattern using Photoshop and the Contrado online design tool.
Photoshop
Photoshop is Adobe’s raster graphics editor, available for both Windows and macOS. Arguably the most popular graphic design program, Adobe Photoshop has endless tools and features to create almost anything that you can possibly imagine. Repeating patterns are no exception. So read on to find out how to make a repeating pattern in Photoshop in a simple step-by-step guide.
Prepping your image from paper
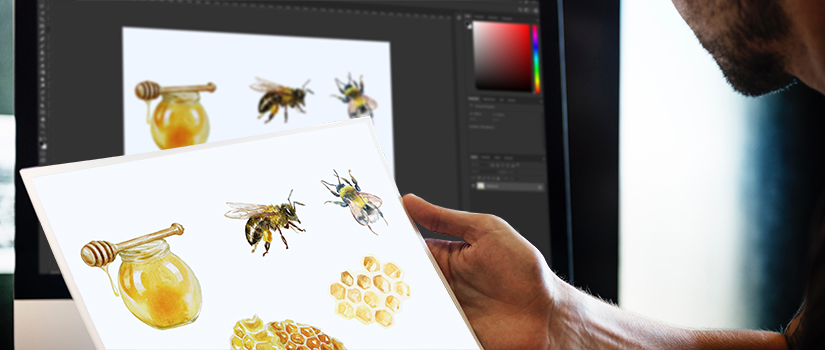
If your pattern components are on paper, you’ll want to scan those into your computer, use at least 300DPI. If you’d like more information on scanning artwork, check out our blog post. Once your image is scanned, you’ll want to cut the components out.
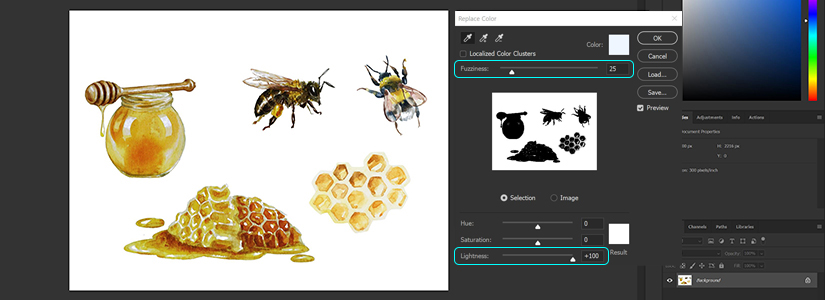
To do this in photoshop, open your images within the program, and use the ‘Replace Colour’ tool. We will be using this to make sure that the background is completely pure white. You’ll find this tool under the image menu, under adjustments. In the replace colour options, set the fuzziness to 25 and ensure that you have ticked the box to show the preview.
Once you have closed the window with the correct settings, you need to click on your background. Doing this will cause the background shade to appear in the box that’s labelled for the colour. You should have a ‘Lightness’ slider. Simply drag this slider all the way to the end, and you should see both your preview and your image change to display a bright white image. Once this is done, click okay.
Cutting out Your Components
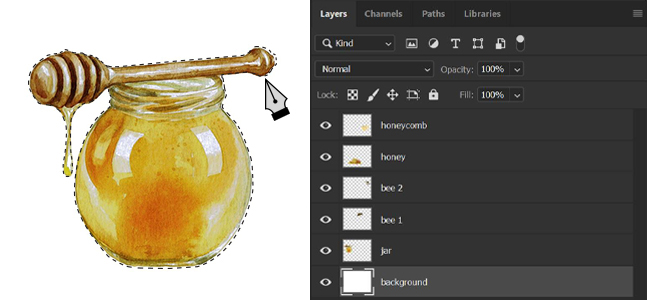
Now you should have your components, either scanned from paper or from a file on your computer in an image file that you can open in Photoshop. Do this now, and then use the ‘Pen’ tool you carefully cut out each component one at a time. Once each component had been carefully traced around, copy and then paste it. It should create a new layer, specifically with that one component on it. Once a separate layer has been made, reselect your original one and cut out the other components too, one at a time.
Eventually, you will have a file with multiple layers. Each layer being one component of the pattern that you want to create. You can do this with one or two pieces, or several. It depends on how you want your finished piece to look.
How to Make a Repeating Pattern
Now that we have the components open, we need to start on bringing those into one file and arranging them. Then we make sure that they will repeat properly. This can be done in a few steps, as outlined below.
Create your canvas
Create a new canvas within Photoshop, by simply selecting ‘New’ from the ‘File’ menu. This canvas will represent one tile or one ‘repeat’ of your pattern. For example, if your pattern is a bee repeated, then this tile would have the bee on it. Or if it is a bee, as well as a honeypot and a honeycomb, it would have that on it.
You can choose the size that you want the canvas to be. It doesn’t even have to be square, but it certainly makes it easier if it is. Remember: the bigger the tile, the fewer times it will repeat. 100 x 100 pixels would be repeated four times on a 200 x 200-pixel background. Whereas 50 x 50 pixels would repeat eight times on the same sized background. Always make sure that you create the canvas with a transparent background. You will be able to see this on your canvas by the checkerboard effect, rather than a plain white background.
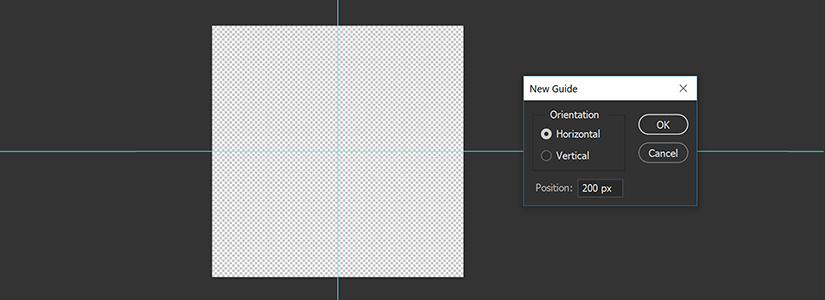
You will need to know where the centre of your canvas is. You can do this by making a note when you create the canvas. (For a 100 x 100-pixel canvas, the mid-point would be at 50 x 50 pixels). Or you can get Photoshop to show you this. Under the ‘View’ tab, you should find an option which says, ‘New Guide’. If you select this, you will get a pop-up form, where you can select ‘Horizontal’ or ‘Vertical’ with a position. Set this up for both horizontal and vertical (separately) and set the position to 50%.
By the time you have finished this step, you should have a crosshair through the centre of your canvas. (You can change the colour of the lines to be easier to see in the ‘Edit’ menu, under ‘Preferences’ you need to select the ‘Guides, Grid & Slices’ menu. Photoshop defaults your guide colour to Cyan.
How to make a repeating pattern tile
Next, you need to go to your original file and select all of your layers which contain your pattern components. Copy this selection, and then paste it into the new canvas that you just created. You can resize this if you want to. To do so, simply select ‘Scale’ from the ‘Transform’ menu under the ‘Edit’ tab. Once the right size, you need to position this in the centre (on the crosshairs if you set up the guides) of your canvas.
You’ll then need to make a duplicate of your first layer. This is done by selecting ‘Layer’ and then ‘Duplicate Layer’, and then confirming by clicking ‘OK’.
If you want more than one component of your repeating pattern to be at the point where the image ‘slices’ for the tile, you will need to add those on to this duplicated layer too.
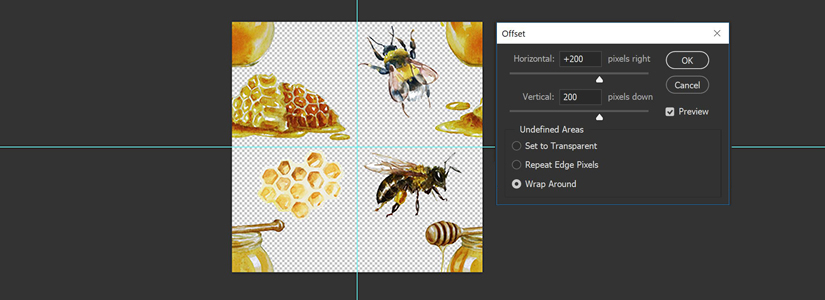
Now select the new layer – the duplicated one – so that we can start actually making a repeat pattern. For the new layer, we need to select ‘Filter’, then ‘Other’ and then go for the ‘Offset’ option. This is where the centre point of your image is needed, the one you made a note of when creating the canvas. Add the centre point in the horizontal and vertical boxes. You can tick the preview box, and this will show you the results on your canvas before you confirm and click ‘OK’. Under the ‘Undefined Areas’ section, you need to make sure that ‘Wrap Around’ is selected.
Your component should now have a duplicated version of itself in each corner of the tile, and your first piece in the centre. You can then fill the blank areas with your other components, if you have any – be careful to make sure that these don’t touch the edges.
How to make a repeating pattern to use in Photoshop
If you want to use your pattern within Photoshop, then you need to basically tell Photoshop that it’s a pattern. To do this, go to the ‘Edit’ tab, and choose the ‘Define Pattern’ option. You will then get a pop-up window form, which asks you to give it a name. At this point, you can call it literally anything you like, but we’d advise that you go for something that will remind you exactly what is on the pattern, and perhaps include the tile size. This last part is especially important if you are new to this or are playing around with several tiles with similar images.
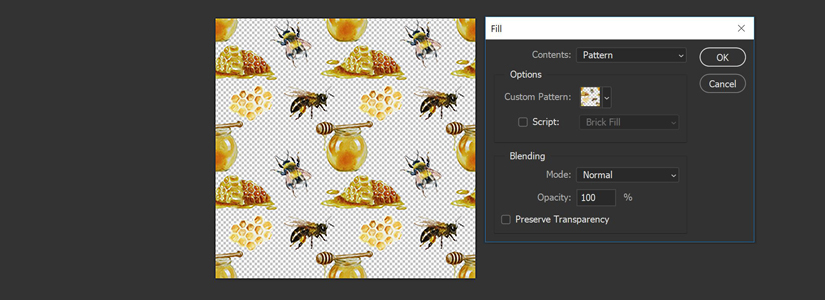
Once you’ve determined a name, simply click ‘OK’ and you have now told Photoshop that this specific image is a pattern. Now when you go to the ‘Fill’ menu, which is also in the ‘Edit’ tab, you will be able to select your pattern. The ’Fill’ form has a ‘Contents’ section at the top.
This is where you would normally select the colour you wish to fill the area with, however, from this menu you can also select ‘Pattern’. Doing this will enable the drop-down menu below it which is labelled ‘Custom Pattern’.
Click the image/preview thumbnail that you can see there, which will open the ‘Pattern Picker’. This will show you all the pattern options that you can select from. Simply select your new pattern tile from there, and Photoshop will fill the area with the repeating pattern that you just learned how to make. It will automatically duplicate it as many times as it needs to so that it fills the area.
How to make a repeating pattern to use on the Contrado website
To be able to use your repeating pattern on the Contrado website, all you need to do is save the tile. We would recommend doing so as a PNG, as this will keep it on a transparent background (if you want to use the Contrado design tool to select your background colour). You may wish to determine the background colour within Photoshop, if that is the case then saving as a standard JPEG will be fine. Use the ‘Save As’ option under the ‘File’ tab and select the file type from the dropdown menu within the form. Again, here you can determine what you want to call your pattern tile, but we would give the same recommendations as we did before.
Now you have seen how to make a repeating pattern, and how to save it for later use in Photoshop as a background, and as a file to upload directly. Simply add it to a range of Contrado products, and use the basic repeat option within the design interface, to tile your pattern across the entire customisable space, and create your patterned background.