Fabric tutorials can range in everything; from a stunning dress to exciting accessories to making your home a more personal space.
Printing custom fabric gives us the unique opportunity to work with so many creative people. Creators and crafters, who can create fabric tutorials as easily as some of us can write a text! When we get the chance to work with these creators, it is a wonderful thing to be able to share their tutorials with the rest of our community.
With sewing, knitting, crochet and other crafts becoming so popular, it is important to make your creations stand out from the crowd. This is where customised fabric comes in. You get the opportunity to showcase, not only your making skills, but also your design skills. Imagine creating your own dress from scratch, not from a fabric you purchased from a store, but from a fabric you designed yourself. These brilliant fabric tutorials have done just that, and their creations definitely stand out.
Fabric tutorials by the Contrado Creators
Our creative community are constantly coming up with new and inspiring fabric tutorials, using custom printed fabric. These crafting bloggers dig out their sewing machines, hot glue guns, beads, fabric scissors and every other essential, to bring you tutorials that are easy and fun to follow. With our latest batch of tutorials, you can learn how to make a dress from a top pattern, how to make a swimming costume, how to create a DIY bed canopy, how to make stunning wall art, and how to make the most adorable raincoat you ever did see.
1. Gina Michele – Sew a Dress Using a Tank Top Pattern
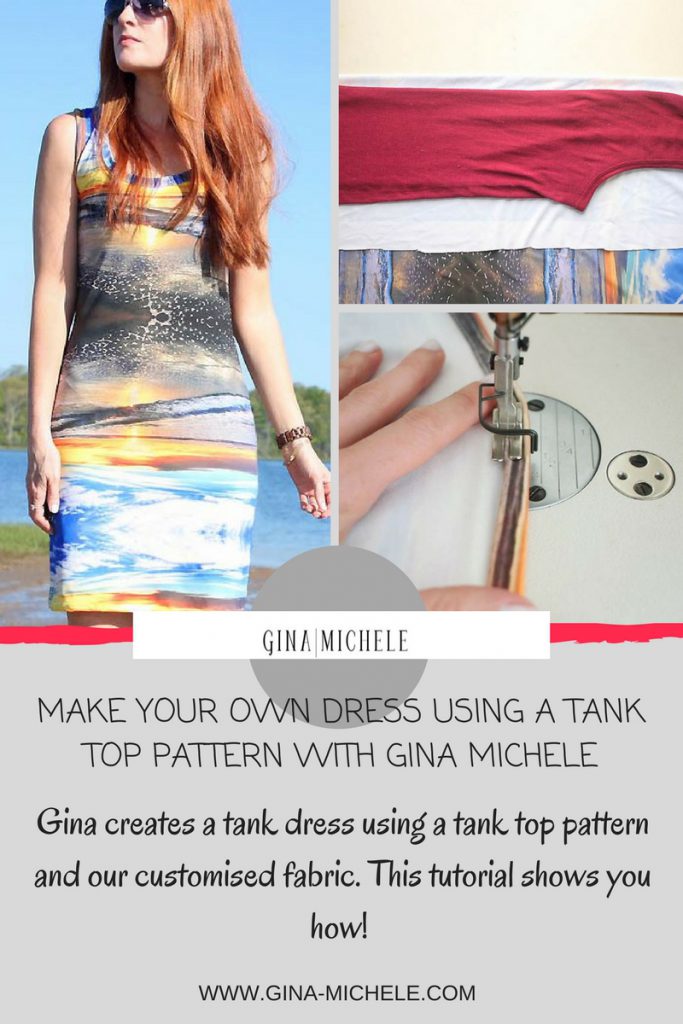
How absolutely stunning is this dress by Gina Michele? If you didn’t know better, you would think that a design and a dress like this would be on sale for a small fortune. But super talented Gina made this dress herself, from her own customised fabric. Best of all, she didn’t even use a traditional sewing pattern, instead she used a tank top.
If you have never visited Gina’s blog, then make sure you put some time aside to check it out. This designer and DIY master creates the most amazing “how to’s” and fabric tutorials. From sewing a faux fur throw to making adorable baby leggings, there isn’t anything this craft queen cannot do.
We worked with Gina on her dress project. She uploaded her beautiful design on our stretch jersey and created a tank dress, which is just ideal for summer. Fancy having a go yourself? Here are the basic steps, but check out her blog for the whole fabric tutorial.
Basic Tutorial:
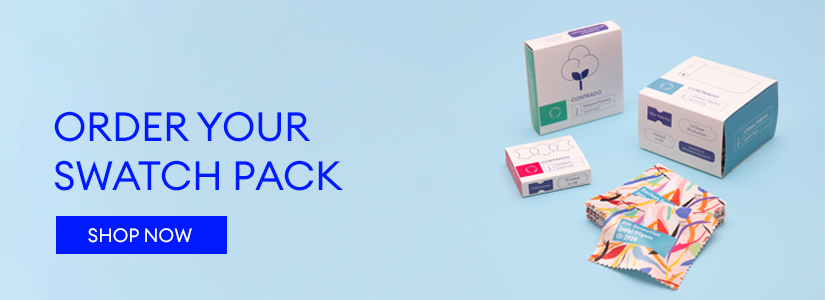
- Choose and design your fabric at Contrado
- Grab a tank top that fits you well
- Fold fabric over and lay the tank near the edge
- Measure on your body how long you want the dress to be and mark the length on the fabric
- Cut out the dress pattern
- Using this piece as a pattern, cut another piece for the back
- Sew the 2 pieces together and the shoulders and sides
- Measure diameter of arm holes and cut 2 pieces of fabric to that length. They should be about 1.5 inches wide
- Sew arm hole strips together
- Fold the arm hole binding over once
- Fold it again and pin down
- Repeat these steps with the other arm hole fabric and collar fabric
- Fold the bottom hem over twice
- Pin the hem fabric and sew
- Try it on a look amazing!
2. Confessions of a Refashionista – Easy Upcycled DIY Bed Canopy
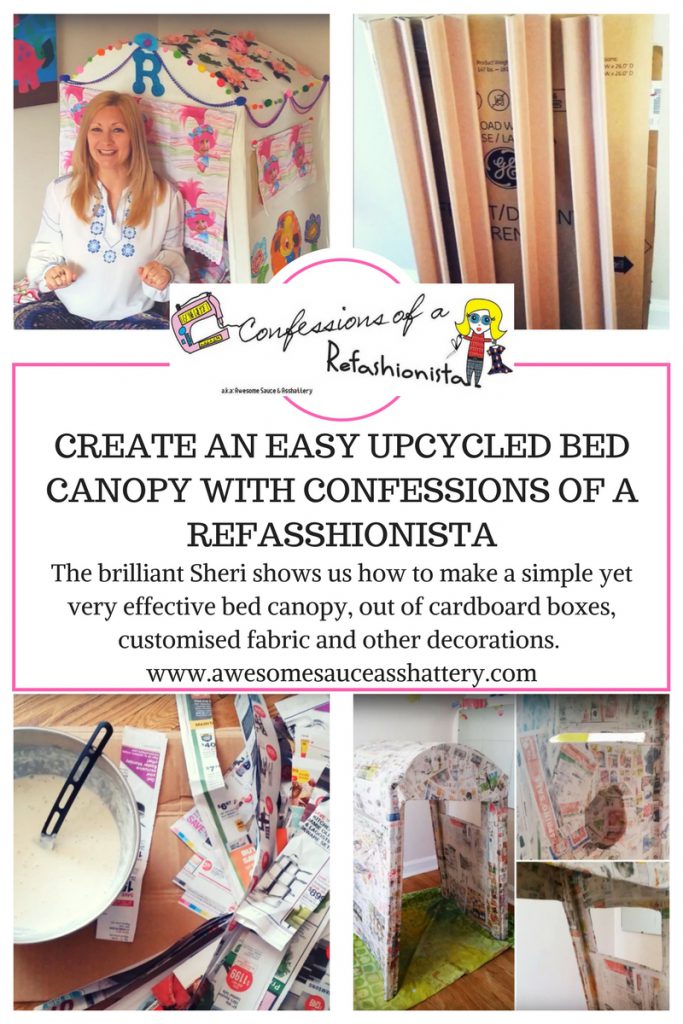
We love Sheri from Confessions of a Refashionista so much. She always comes up with the most creative DIY projects and fabric tutorials. We have seen her work wonders with a glue gun and a sewing machine, and this tutorial is no different. Ready to make your bed, or your little one’s bed pop?
This upcycled project is a brilliant way of adding character and personality to a child’s bedroom. Sheri used a huge cardboard box as the base for her DIY bed canopy, and used our custom printed fabric and other adorable decorations to make it personal for her daughter.
Fancy having a go yourself? Follow these basic steps but we recommend visiting Sheri’s blog for the whole video tutorial.
Basic Tutorial:
- You will need; a large box, cutting tool, tape, papier mache, paper strips, paint, decorations, fabric
- Measure the width and the height needed from your box
- Cut out the pieces from the box and tape them together
- Mix equal parts of warm water and flour to make a thin paste for your papier mache
- Get your paper strips and soak them in the paste
- Give the canopy 4 – 5 layers of papier mache and allow it to dry completely
- Once the canopy is dry, paint it in the colour of your choice
- Decorate it as you wish! Sheri used custom printed fabric and an assortment of decorations, beads and other accessories
3. Snugglebug University – DIY Kitchen Art
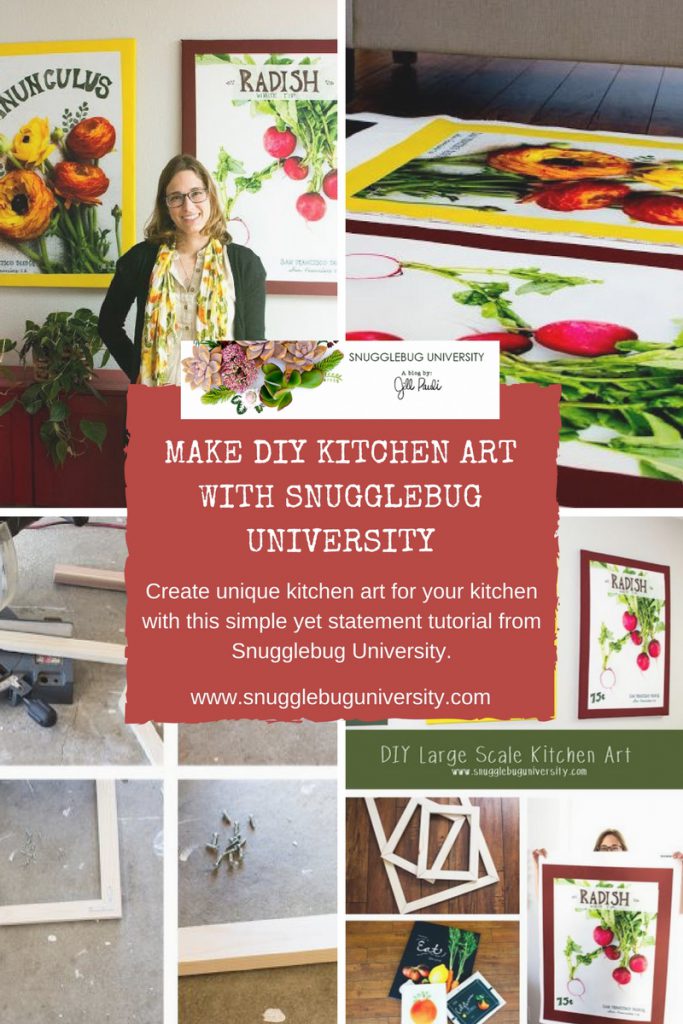
When it comes to gorgeous photos, fun fabric tutorials and creative ideas, Jill from Snugglebug University is up there as one of our favourites. We love so many of Jill’s blog posts, teaching us how to make everything from bed canopies and decorative pillows, to DIY picture frames and curtains.
We worked with Jill to create custom printed canvas fabric for her to make wall art with. Printing her original artwork on our canvas, is a whole new way to make her designs pop. It also means that they can be displayed in a way for everyone to see – and appreciate!
From the customised canvas, Jill made 5 art prints, and the finished result is just beautiful. If you want to have a go a creating your own custom made wall art, then follow Snugglebug’s tutorial. Check out her blog for the full steps.
Basic Tutorial:
- You will need: a mitr saw, angle brackets with screws, a screwdriver, a staple gun, a mounting bracket and hammer, wood for the frame (Jill used 1 x 2 inch white wood boards) and finally, your own designs printed on fabric
- If you need to cut your art from the fabric, make sure you leave enough fabric to wrap the edges around the wooden frame
- Measure each side so the pieces have about an inch of coloured overhang on each side
- Use your saw to cut the wood pieces to the correct size
- Use a screw driver to screw in the angle brackets to each of the pieces
- Lay the frame on top of the fabric image side down
- Pull the canvas on the opposite side so that it is taut
- Staple the edges
- Custom canvas in no time at all!
4. Seamstress Erin Designs – Rainbow Raindrops Waterproof Minoru Raincoat
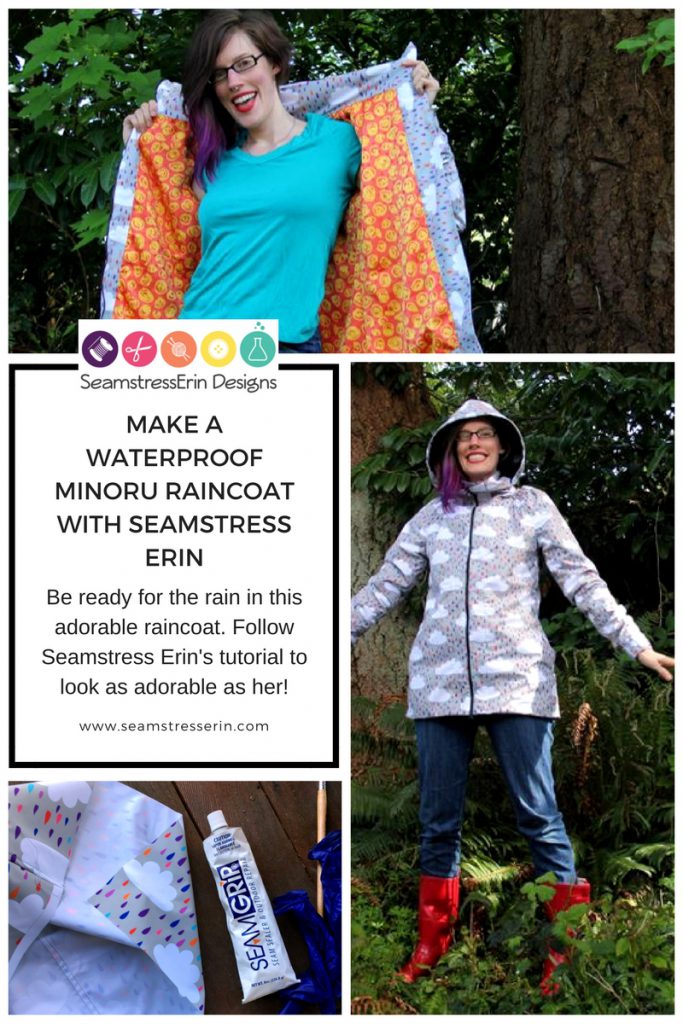
Sewing obsessed Erin from Seamstress Erin Designs is such an inspiration. From her amazing patterns, to her gorgeous fashion sense, this is a lady who who you want to be following.
Erin is based in Seattle, in the USA. And it rains there. A lot. So Erin using our custom printed fabric to make a raincoat seems like the perfect choice. Using Sewaholic’s Minoru Pattern to create the coat and our breathable waterproof fabric to make it from. Her design is so sweet – cute little clouds with colourful raindrops.
To create this raincoat yourself, you will need to download the Minoru Jacket pattern (www.sewaholicpatterns.com/minoru-jacket-pdf-sewing-pattern) but make sure you pay a visit to Erin’s blog for the full run down, and even more beautiful photos.
5. Meggipeg – Sophie Swimsuit with Custom Printed Fabric

We all need to stop for a moment and appreciate how beautiful this swimsuit by Meg from Meggi Peg is. Meg created her custom printed fabric using one of her mum’s original paintings. The finished result is just stunning.
Meg used our customised Slinky Matt Lycra to create her swimsuit, which is ideal thanks to its form fitting body, water resistant finish and flexibility. The print of Meg’s mum’s painting looks amazing. Vibrant colours, clear detailing and a sharp finish.
Ordering a piece of the Lycra 100cm wide x 60cm long, Meg was able to make a swimsuit for her body shape. You need to work out exactly how much fabric you will need before ordering, to ensure you have enough but not too much left over and wasted.
If you want to create this swimsuit for yourself, you will need to download the Sophie Swimsuit pattern by Close Case Patterns (https://store.closetcasepatterns.com/products/sophie-swimsuit-pattern)
Now that you have been inspired, it is time to pick up your sewing needle, download that pattern, dig out your sewing machine, and get creating! Thanks so much to this super talented bunch of creators. We can’t wait to see what you come up with next.